The four default vehicle types included with CalAmp K-12 (cars, trucks, buses, and vans) may serve your purposes, or you may find that your organization has another kind of vehicle you need to track. If so, you can add a new vehicle type, as follows:
- Click
 >> Vehicle Types.

- Click
 at the top right.
The Add New Vehicle Type screen will appear.

- Type the kind of vehicle it is in the Name box.
- Fill in the other fields with your best estimates, including how many miles one such vehicle will be driven in a year, how many miles per gallon it gets, and how much gas it uses when idling (in gallons per hour).
Note: Benchmark % Utilization is typically set to 80, indicating a goal of at least 80% of your vehicles being used on average. - Click the Events tab.

- If you need to track stops for this type of vehicle (and populate the Stop report), click the Start Event and Stop Event drop-down arrows and select the CalAmp K-12 events to use to trigger and end an official "stop," such as Ignition Off and Ignition On, or Entrance Door Open and Entrance Door Close.
- You can change the icon that is displayed for this type of vehicle on the map screens by clicking Select Icon and selecting a new one in the box that appears, or by clicking Upload Image and uploading a custom image.
Note: The recommended image dimensions for a custom icon are 16 x 16 px, and the file size limit is 2KB. - In the Idling per Season area, type the acceptable number of minutes the vehicle is allowed to idle before the Idle Alert event is triggered, per season, such as 5.
Note: Winter has a separate setting because some customers set a higher number of allowed idling minutes in winter, to allot more time for the vehicle to warm up. - In the Railroad Events area, select the events you want to require your drivers to perform at railroad crossings. (
 means selected, and
  deselected.)
Note: These can be set up to trigger the RR Check events, which you can check for on the Vehicle History screen. - Click the Pre/Post Trip tab.
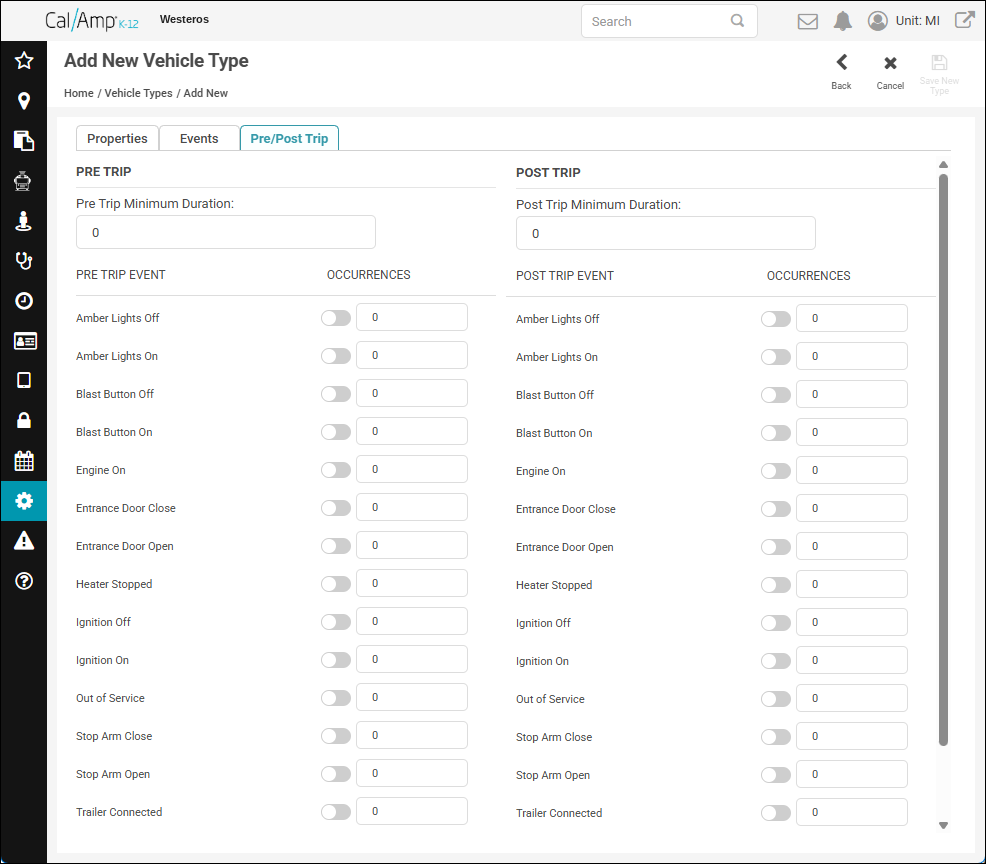
Note: The settings on this tab populate the Inspection reports. - Type the minimum amount of time your drivers should be spending on inspecting the vehicle before (pre) and after (post) a trip in the Pre Trip Minimum Duration and Post Trip Minimum Duration boxes.
- In the Pre Trip and Post Trip Event lists, select the events your drivers are required to perform during the inspections, and in the corresponding Occurrences boxes, type the number of occurrences (such as if they should open and close the entrance door once, type 1 in those boxes).
- Click
 at the top right of the screen.
You'll be returned to the Vehicle Types screen, and your new vehicle type will appear in the list.