To add vehicles to a group, follow these steps:
- Click
 >> Groups.
The Groups screen will appear.

- Click
 to the left of the group name.
Note: If the group is a child group, to access it in the grid, click to expand the parent group first.
The Assign Vehicles screen will appear.

- In the Out of Group list, click the check boxes to the left of the vehicles you want to add to the group.
- Click
 .
.
The vehicles you selected will appear in the In Group list.
Note: If you need to remove any vehicles you added, select their check boxes in the In Group list and click .
. - If this is the newly assigned vehicles' primary group, select the Primary check box to the right of the vehicle name.
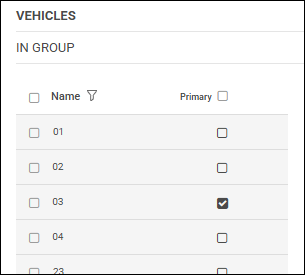
Note: If this group is not the vehicles' primary group (but an additional group to which you are adding them), you can leave Primary unchecked.
If this group is the primary group for all the vehicles in the In Group list, you can select the check box to the right of the Primary column heading.
Warning: If you select the Primary check box for a vehicle, this group will become its primary group, even if the vehicle had been assigned to a different group as its primary before. (See Changing a Vehicle's Primary Group for details.) - Click
 at the top right of the screen.